
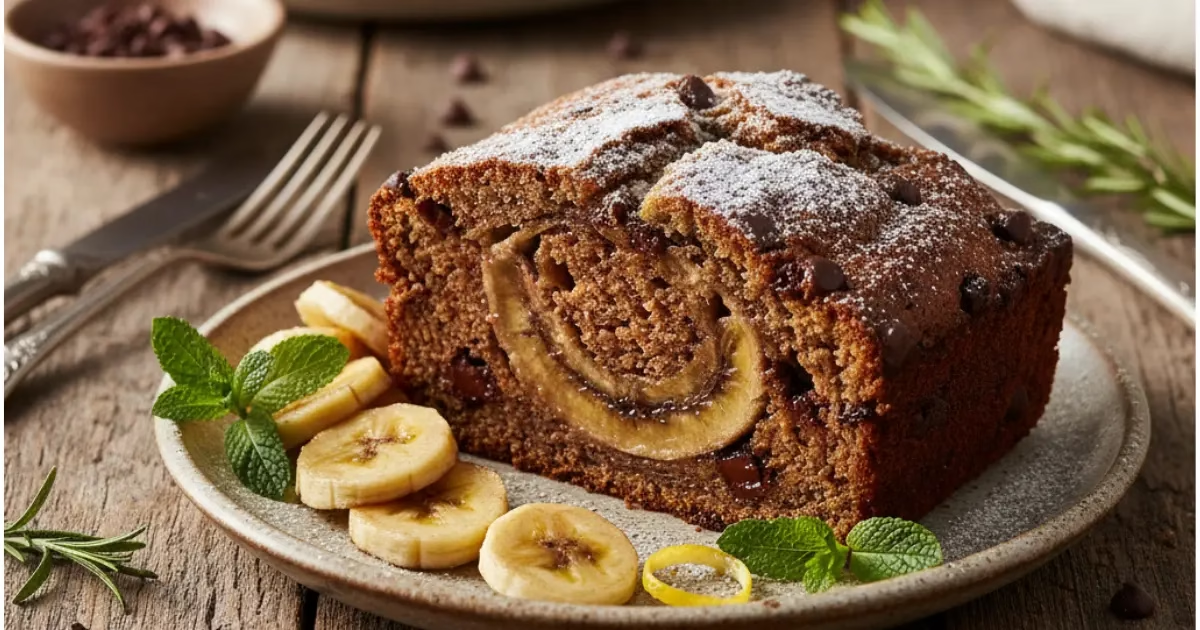
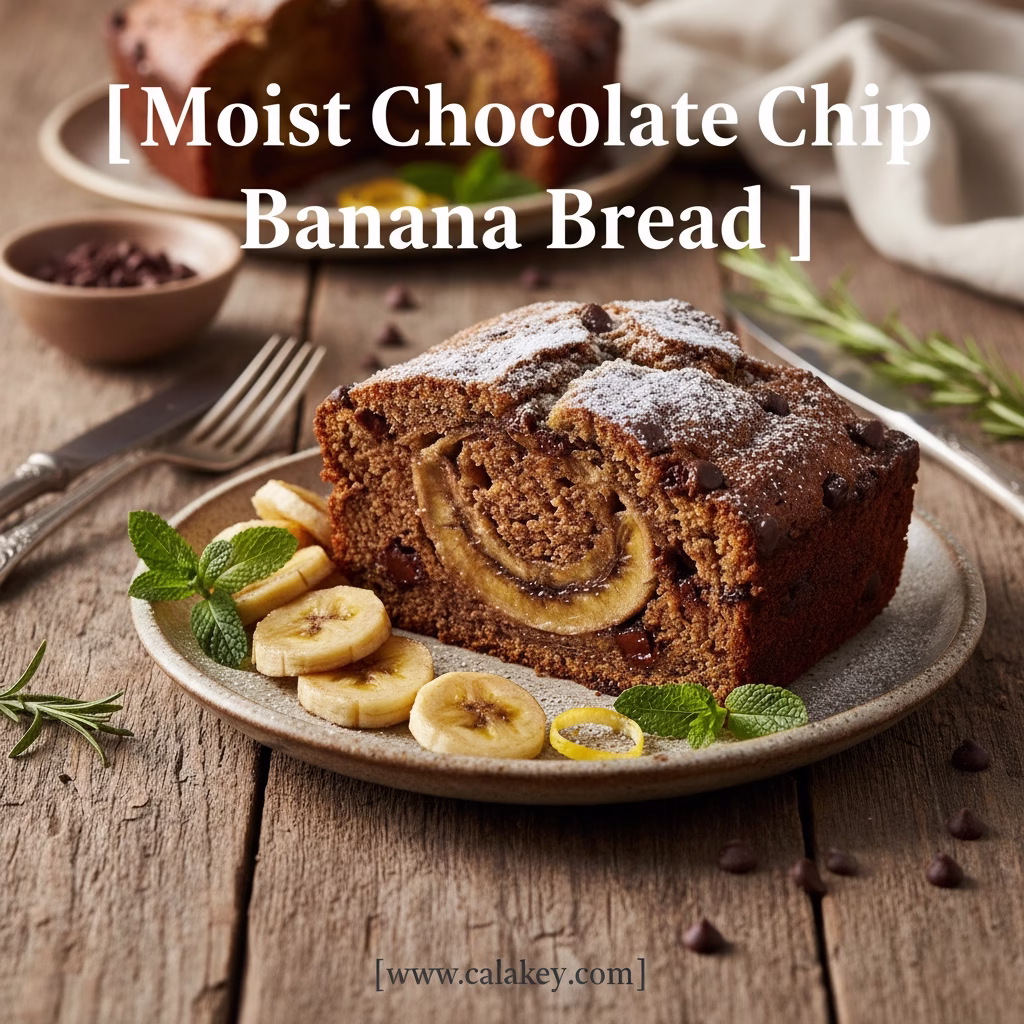
Moist Chocolate Chip Banana Bread
There’s something magical about the aroma of freshly baked banana bread wafting through your kitchen on a lazy Sunday morning. But let me tell you, not all banana bread recipes are created equal. I’ve spent years perfecting this chocolate chip banana bread recipe, and I can confidently say it’s a game-changer. This isn’t just any banana bread—it’s wonderfully moist, loaded with ripe bananas, and stays incredibly tender for days. The best part? It literally comes together in one bowl, making cleanup a breeze and the entire process stress-free.
Whether you’re a seasoned baker or someone who barely knows their way around a mixing bowl, this recipe will become your go-to comfort food. The combination of sweet, caramelized bananas and melty chocolate chips creates a flavor profile that’s absolutely irresistible. Plus, you’ll look like a baking genius without breaking a sweat.
moist chocolate chip banana bread
Table of Contents
The Secret to Perfect Banana Bread: Temperature Matters
Before we dive into the fun stuff, let me share the most important tip that separates mediocre banana bread from absolutely spectacular banana bread: temperature control. This might sound technical, but trust me, it’s incredibly simple and makes all the difference in the world.
Your eggs, butter, and bananas need to be at room temperature before you start mixing. Why does this matter so much? When ingredients are at the same temperature, they cream together smoothly, creating that perfect, velvety texture we’re after. Cold butter won’t incorporate properly with sugar, and cold eggs can cause your batter to seize up, resulting in a dense, uneven loaf.
Here’s a lifesaver trick I learned from my grandmother: if you forget to take your eggs out ahead of time, simply place them in a bowl of warm (not hot) water for about five minutes. Problem solved! For butter, cut it into small cubes and let it sit on the counter while you gather your other ingredients. It’ll soften up nicely in about fifteen to twenty minutes.
Choosing and Preparing Your Bananas: The Foundation of Flavor
Let’s talk bananas—because honestly, they’re the star of this show. I can’t stress this enough: you need very ripe, almost embarrassingly mushy bananas for this recipe. I’m talking about those bananas sitting on your counter that you’ve been avoiding all week because they look past their prime. The ones with peels that are significantly browned, maybe even black in spots, and feel soft and squishy when you give them a gentle squeeze.
Why such ripe bananas? As bananas ripen, their starches convert to natural sugars, making them incredibly sweet and adding tremendous moisture to your bread. Those spotty, brown bananas are nature’s candy, and they’ll naturally sweeten your bread while keeping it tender and moist for days.
When it comes to mashing, you’re aiming for a chunky applesauce consistency. I personally use a fork and mash them right in my mixing bowl—no fancy equipment needed. You want to break down most of the banana, but leaving some small chunks adds wonderful texture throughout the bread. Don’t obsess over getting it perfectly smooth; those little bits of banana create pockets of concentrated flavor.
Got frozen bananas in your freezer? Absolutely use them! Frozen bananas are actually perfect for banana bread because they break down even more easily. Just thaw them completely and drain any excess liquid that accumulates. That liquid is pure banana flavor, but too much will throw off your wet-to-dry ingredient ratio.
Customizing Your Chocolate Chips: Finding Your Perfect Match
Now for the fun part—chocolate! I typically use semi-sweet chocolate chips in this recipe because the overripe bananas already bring plenty of natural sweetness to the table. The slight bitterness of semi-sweet chocolate creates a beautiful balance that prevents the bread from being cloying or one-dimensional.
That said, baking should be personal, and you know your taste buds better than anyone. If you’ve got a serious sweet tooth or you’re baking for kids who think anything remotely dark is too bitter, go ahead and use milk chocolate chips. They’ll melt into sweet, gooey pockets throughout your bread.
On the flip side, if you’re like me and prefer desserts that aren’t overwhelmingly sweet, try bittersweet chocolate chips. They add depth and sophistication, letting the banana flavor shine through while providing that essential chocolate hit we’re all craving.
Here’s a pro tip about chip sizing: mini chocolate chips work beautifully in this recipe too. Because they’re smaller, you’ll get chocolate in almost every single bite, creating a more uniform distribution throughout the loaf. If you’re using mini chips, reduce the amount slightly—about two-thirds to three-quarters of a cup should do the trick.
Mixing It All Together: The One-Bowl Wonder
Alright, let’s get baking! First things first: preheat your oven to 350°F and prepare your loaf pan by buttering and flouring it generously. Don’t skip this step unless you enjoy watching your beautiful bread stick stubbornly to the pan.
Start by creaming your softened butter with sugar until it’s light and fluffy. This usually takes about two to three minutes with a hand mixer or wooden spoon if you’re feeling old-school. Add your room temperature eggs one at a time, beating well after each addition. The mixture should look smooth and slightly glossy.
Next, fold in your mashed bananas and vanilla extract. The mixture might look a little curdled at this point—don’t panic! That’s totally normal and will smooth out once you add the dry ingredients.
In the same bowl (told you it was a one-bowl recipe!), whisk together your flour, baking soda, and salt. Make sure these dry ingredients are well combined before you start mixing everything together. Here’s where many people mess up: don’t overmix once you add the flour. Overmixing develops gluten, which makes your bread tough and chewy instead of tender and moist. Mix just until you don’t see any more dry flour streaks.
Your finished batter should be thick and have small lumps of banana throughout—that’s exactly what you want. If your batter looks too thin, you might have used bananas that were too wet or didn’t measure your flour correctly.
Want to take this recipe up another notch? Add one teaspoon of cinnamon to your dry ingredients. The warm spice complements both the banana and chocolate beautifully, adding depth and a subtle complexity that’ll have people asking what your secret ingredient is.
Here’s a trick that makes your banana bread look bakery-worthy: fold three-quarters of your chocolate chips into the batter, then sprinkle the remaining quarter cup over the top before baking. This ensures you get melty chocolate throughout while creating those gorgeous, picture-perfect chocolate chips dotting the surface that practically beg to be Instagram-ed.
Baking to Perfection
Pour your batter into your prepared loaf pan and pop it into your preheated 350°F oven. Set your timer for fifty-five minutes, but know that this bread typically needs somewhere between fifty-five and sixty-five minutes depending on your oven and the depth of your pan.
The toothpick test is your best friend here. Starting at the fifty-five-minute mark, insert a toothpick into the center of the loaf. If it comes out clean or with just a few moist crumbs, you’re golden. If it’s coated with wet batter, give it another five minutes and check again.
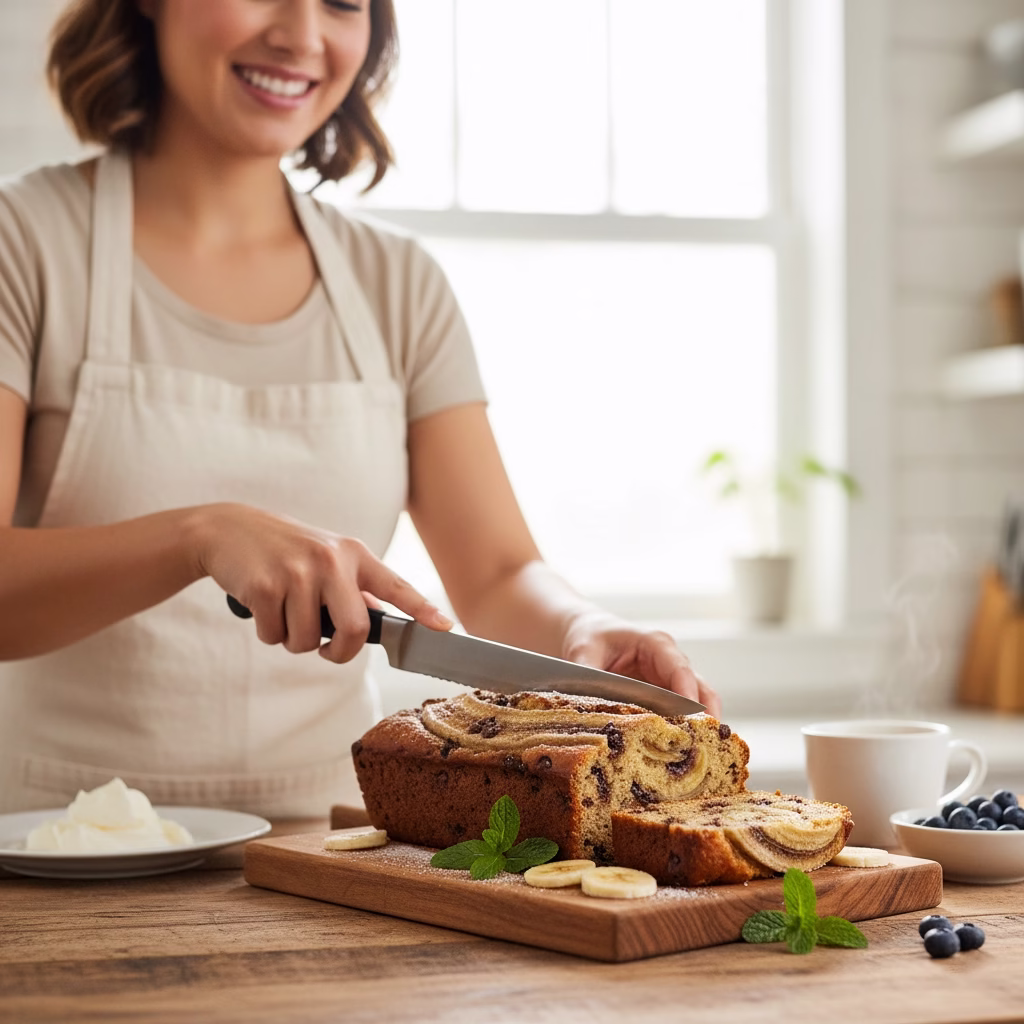
Once your bread is perfectly baked, resist the urge to slice into it immediately (I know, it smells incredible and your willpower is being tested). Let it rest in the pan for ten minutes before carefully turning it out onto a wire rack to cool completely. This resting period allows the structure to set, preventing your bread from falling apart when you slice it.
Keeping Your Bread Moist and Delicious
Here’s some great news: you can actually make this batter ahead of time! If you’re planning for a busy morning or want to streamline your baking process, store the unbaked batter in your refrigerator for up to twenty-four hours. Just give it a gentle stir before pouring it into your pan and baking as directed.
Once your banana bread is completely cooled, wrap it tightly in plastic wrap or store it in an airtight container. At room temperature, it’ll stay fresh and moist for up to two days. The high banana content naturally preserves moisture, so your second-day slice will taste just as amazing as the first.
Now, here’s something crucial: resist the temptation to refrigerate your banana bread. I know it seems counterintuitive, but refrigeration actually dries out baked goods because the cold air pulls moisture out. While it’s safe to refrigerate for three to five days if you absolutely must, the texture won’t be quite as perfect.
For maximum longevity, freezing is your best bet. Wrap your cooled loaf in a layer of aluminum foil—this double barrier prevents freezer burn and locks in freshness. Properly wrapped banana bread will keep beautifully in the freezer for up to three months. When you’re ready to enjoy it, simply thaw it at room temperature for a few hours. It’ll taste like you just baked it fresh.
This chocolate chip banana bread has saved me countless times—from unexpected guests to bake sale emergencies to those moments when I just need something warm, comforting, and absolutely delicious. It’s foolproof, forgiving, and utterly delightful. So grab those overripe bananas sitting on your counter and give this recipe a try. Your kitchen will smell amazing, your family will be impressed, and you’ll wonder why you ever bothered with complicated recipes when something this simple could taste this incredible.There’s something magical about the aroma of freshly baked banana bread wafting through your kitchen on a lazy Sunday morning. But let me tell you, not all banana bread recipes are created equal. I’ve spent years perfecting this chocolate chip banana bread recipe, and I can confidently say it’s a game-changer. This isn’t just any banana bread—it’s wonderfully moist, loaded with ripe bananas, and stays incredibly tender for days. The best part? It literally comes together in one bowl, making cleanup a breeze and the entire process stress-free.
Whether you’re a seasoned baker or someone who barely knows their way around a mixing bowl, this recipe will become your go-to comfort food. The combination of sweet, caramelized bananas and melty chocolate chips creates a flavor profile that’s absolutely irresistible. Plus, you’ll look like a baking genius without breaking a sweat.
The Secret to Perfect Banana Bread: Temperature Matters
Before we dive into the fun stuff, let me share the most important tip that separates mediocre banana bread from absolutely spectacular banana bread: temperature control. This might sound technical, but trust me, it’s incredibly simple and makes all the difference in the world.
Your eggs, butter, and bananas need to be at room temperature before you start mixing. Why does this matter so much? When ingredients are at the same temperature, they cream together smoothly, creating that perfect, velvety texture we’re after. Cold butter won’t incorporate properly with sugar, and cold eggs can cause your batter to seize up, resulting in a dense, uneven loaf.
Here’s a lifesaver trick I learned from my grandmother: if you forget to take your eggs out ahead of time, simply place them in a bowl of warm (not hot) water for about five minutes. Problem solved! For butter, cut it into small cubes and let it sit on the counter while you gather your other ingredients. It’ll soften up nicely in about fifteen to twenty minutes.
Choosing and Preparing Your Bananas: The Foundation of Flavor
Let’s talk bananas—because honestly, they’re the star of this show. I can’t stress this enough: you need very ripe, almost embarrassingly mushy bananas for this recipe. I’m talking about those bananas sitting on your counter that you’ve been avoiding all week because they look past their prime. The ones with peels that are significantly browned, maybe even black in spots, and feel soft and squishy when you give them a gentle squeeze.
Why such ripe bananas? As bananas ripen, their starches convert to natural sugars, making them incredibly sweet and adding tremendous moisture to your bread. Those spotty, brown bananas are nature’s candy, and they’ll naturally sweeten your bread while keeping it tender and moist for days.
When it comes to mashing, you’re aiming for a chunky applesauce consistency. I personally use a fork and mash them right in my mixing bowl—no fancy equipment needed. You want to break down most of the banana, but leaving some small chunks adds wonderful texture throughout the bread. Don’t obsess over getting it perfectly smooth; those little bits of banana create pockets of concentrated flavor.
Got frozen bananas in your freezer? Absolutely use them! Frozen bananas are actually perfect for banana bread because they break down even more easily. Just thaw them completely and drain any excess liquid that accumulates. That liquid is pure banana flavor, but too much will throw off your wet-to-dry ingredient ratio.
Customizing Your Chocolate Chips: Finding Your Perfect Match
Now for the fun part—chocolate! I typically use semi-sweet chocolate chips in this recipe because the overripe bananas already bring plenty of natural sweetness to the table. The slight bitterness of semi-sweet chocolate creates a beautiful balance that prevents the bread from being cloying or one-dimensional.
That said, baking should be personal, and you know your taste buds better than anyone. If you’ve got a serious sweet tooth or you’re baking for kids who think anything remotely dark is too bitter, go ahead and use milk chocolate chips. They’ll melt into sweet, gooey pockets throughout your bread.
On the flip side, if you’re like me and prefer desserts that aren’t overwhelmingly sweet, try bittersweet chocolate chips. They add depth and sophistication, letting the banana flavor shine through while providing that essential chocolate hit we’re all craving.
Here’s a pro tip about chip sizing: mini chocolate chips work beautifully in this recipe too. Because they’re smaller, you’ll get chocolate in almost every single bite, creating a more uniform distribution throughout the loaf. If you’re using mini chips, reduce the amount slightly—about two-thirds to three-quarters of a cup should do the trick.
Mixing It All Together: The One-Bowl Wonder
Alright, let’s get baking! First things first: preheat your oven to 350°F and prepare your loaf pan by buttering and flouring it generously. Don’t skip this step unless you enjoy watching your beautiful bread stick stubbornly to the pan.
Start by creaming your softened butter with sugar until it’s light and fluffy. This usually takes about two to three minutes with a hand mixer or wooden spoon if you’re feeling old-school. Add your room temperature eggs one at a time, beating well after each addition. The mixture should look smooth and slightly glossy.
Next, fold in your mashed bananas and vanilla extract. The mixture might look a little curdled at this point—don’t panic! That’s totally normal and will smooth out once you add the dry ingredients.
In the same bowl (told you it was a one-bowl recipe!), whisk together your flour, baking soda, and salt. Make sure these dry ingredients are well combined before you start mixing everything together. Here’s where many people mess up: don’t overmix once you add the flour. Overmixing develops gluten, which makes your bread tough and chewy instead of tender and moist. Mix just until you don’t see any more dry flour streaks.
Your finished batter should be thick and have small lumps of banana throughout—that’s exactly what you want. If your batter looks too thin, you might have used bananas that were too wet or didn’t measure your flour correctly.
Want to take this recipe up another notch? Add one teaspoon of cinnamon to your dry ingredients. The warm spice complements both the banana and chocolate beautifully, adding depth and a subtle complexity that’ll have people asking what your secret ingredient is.
Here’s a trick that makes your banana bread look bakery-worthy: fold three-quarters of your chocolate chips into the batter, then sprinkle the remaining quarter cup over the top before baking. This ensures you get melty chocolate throughout while creating those gorgeous, picture-perfect chocolate chips dotting the surface that practically beg to be Instagram-ed.
Baking to Perfection
Pour your batter into your prepared loaf pan and pop it into your preheated 350°F oven. Set your timer for fifty-five minutes, but know that this bread typically needs somewhere between fifty-five and sixty-five minutes depending on your oven and the depth of your pan.
The toothpick test is your best friend here. Starting at the fifty-five-minute mark, insert a toothpick into the center of the loaf. If it comes out clean or with just a few moist crumbs, you’re golden. If it’s coated with wet batter, give it another five minutes and check again.
Once your bread is perfectly baked, resist the urge to slice into it immediately (I know, it smells incredible and your willpower is being tested). Let it rest in the pan for ten minutes before carefully turning it out onto a wire rack to cool completely. This resting period allows the structure to set, preventing your bread from falling apart when you slice it.
Keeping Your Bread Moist and Delicious
Here’s some great news: you can actually make this batter ahead of time! If you’re planning for a busy morning or want to streamline your baking process, store the unbaked batter in your refrigerator for up to twenty-four hours. Just give it a gentle stir before pouring it into your pan and baking as directed.
Once your banana bread is completely cooled, wrap it tightly in plastic wrap or store it in an airtight container. At room temperature, it’ll stay fresh and moist for up to two days. The high banana content naturally preserves moisture, so your second-day slice will taste just as amazing as the first.
Now, here’s something crucial: resist the temptation to refrigerate your banana bread. I know it seems counterintuitive, but refrigeration actually dries out baked goods because the cold air pulls moisture out. While it’s safe to refrigerate for three to five days if you absolutely must, the texture won’t be quite as perfect.
For maximum longevity, freezing is your best bet. Wrap your cooled loaf in a layer of aluminum foil—this double barrier prevents freezer burn and locks in freshness. Properly wrapped banana bread will keep beautifully in the freezer for up to three months. When you’re ready to enjoy it, simply thaw it at room temperature for a few hours. It’ll taste like you just baked it fresh.
This chocolate chip banana bread has saved me countless times—from unexpected guests to bake sale emergencies to those moments when I just need something warm, comforting, and absolutely delicious. It’s foolproof, forgiving, and utterly delightful. So grab those overripe bananas sitting on your counter and give this recipe a try. Your kitchen will smell amazing, your family will be impressed, and you’ll wonder why you ever bothered with complicated recipes when something this simple could taste this incredible.
There are no reviews yet. Be the first one to write one.