
How to Make Sourdough Sandwich Bread at Home
The smell of fresh bread is irresistible to me. Years ago, I found a recipe for homemade sourdough sandwich bread. It turned my kitchen into a cozy haven.
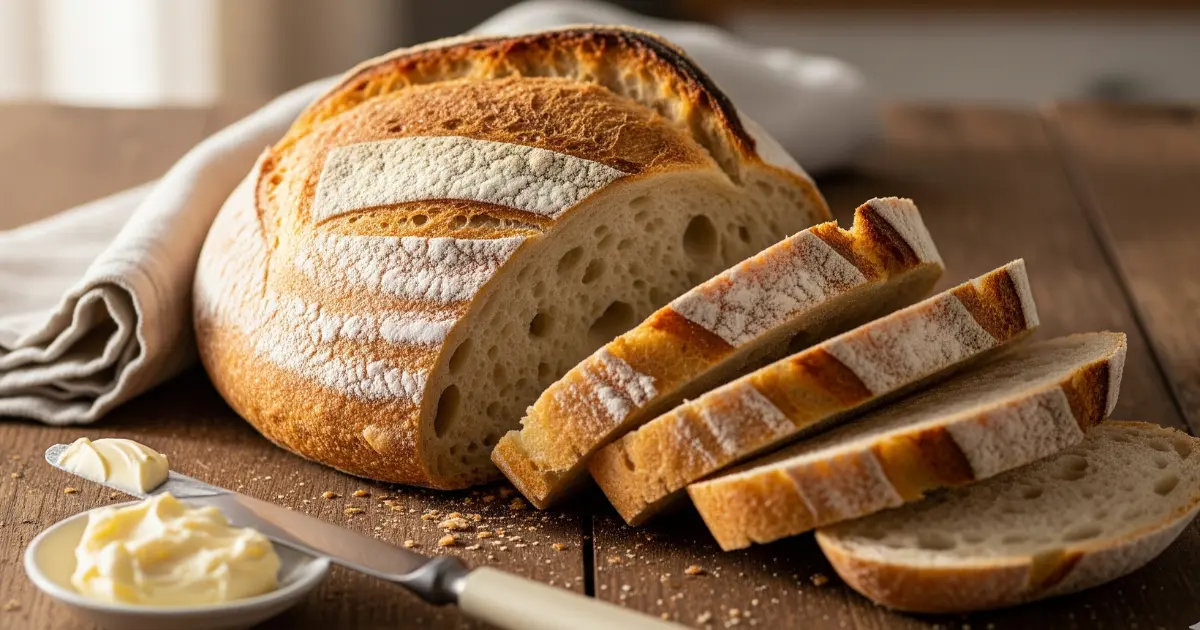
Creating sourdough bread is more than baking. It’s about connecting with a long-standing tradition. This bread has a rich flavor and texture that store-bought can’t match. Your sourdough bread will be a personal triumph.
If you’re new to baking or want to improve, this guide is for you. You’ll learn how to make a delicious, tangy loaf. It will wow your loved ones.
Table of Contents
Key Takeaways
- Sourdough sandwich bread is naturally fermented with superior taste
- Homemade sourdough bread offers healthier nutritional profile
- Baking requires patience but delivers exceptional results
- Natural ingredients create more flavorful bread
- Mastering sourdough techniques enhances culinary skills
Understanding Sourdough Sandwich Bread Basics
Sourdough bread is a fascinating art that turns simple ingredients into something complex and tasty. It’s different from regular bread because of its unique fermentation process.
The magic starts with a sourdough starter. This is a mix of flour, water, and wild yeasts. It makes the bread taste deeper and easier to digest than bread made with commercial yeast.
What Makes Sourdough Different from Regular Bread
Sourdough bread stands out in several ways:
- It uses wild yeasts and bacteria, not commercial yeast.
- It has a more complex, tangy taste.
- It needs a longer fermentation time.
- It’s better for you nutritionally.
Benefits of Making Sourdough at Home
Home-made sourdough bread has many perks for bakers:
- You can choose exactly what goes into it.
- You can make it taste and feel just how you like.
- It’s cheaper than buying it from a bakery.
- It’s a fun and rewarding thing to do.
Essential Equipment Needed
To make sourdough sandwich bread, you’ll need some special tools:
- A digital kitchen scale for accurate measurements.
- Large mixing bowls.
- A proofing basket or banneton.
- A Dutch oven or baking stone.
- A bench scraper.
- An instant-read thermometer.
Good bread baking tools make a big difference. They help you make delicious sourdough bread every time.
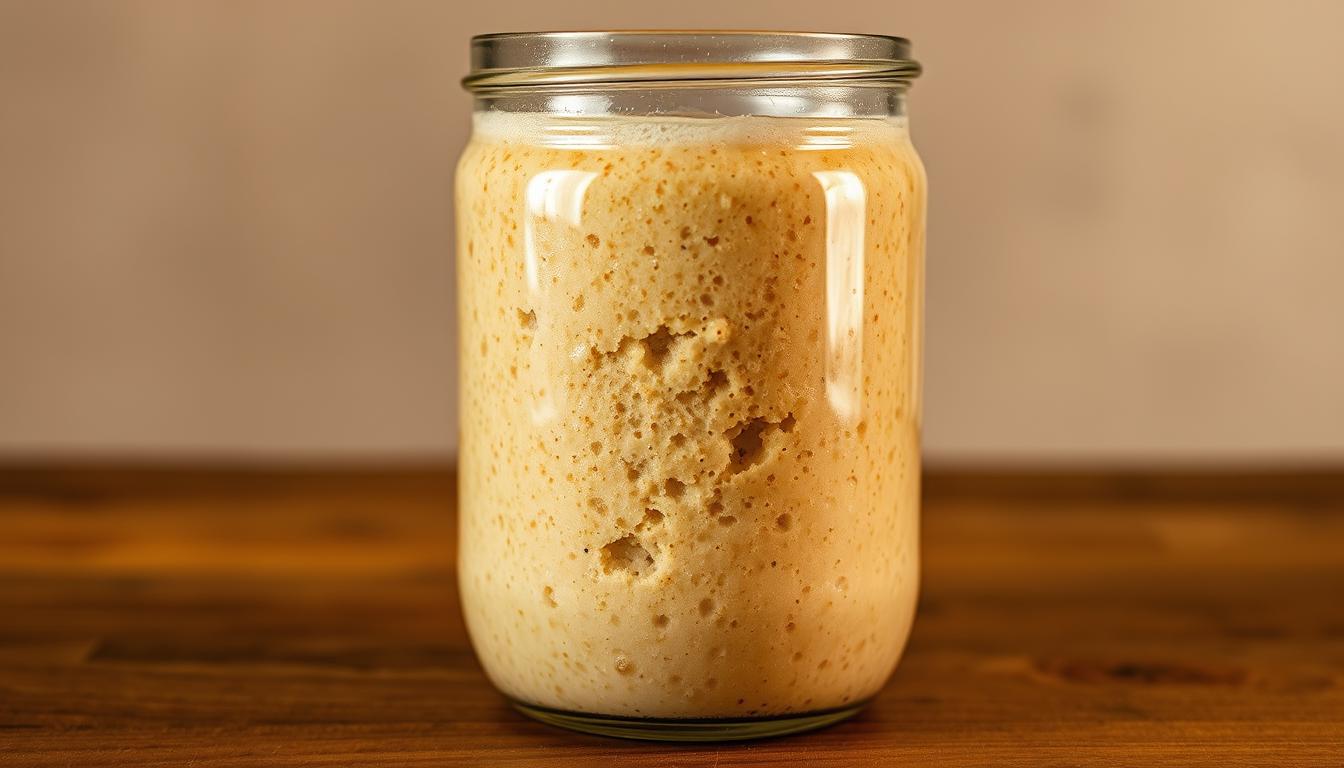
Creating and Maintaining Your Sourdough Starter
Making a strong sourdough starter is key to baking great artisan bread. It’s a mix of wild yeast and bacteria that turns flour and water into a powerful leavening agent. Taking care of your starter needs patience, regular care, and knowing how it works.
- Unbleached all-purpose or bread flour
- Filtered water
- Clean glass or ceramic container
- Kitchen scale
- Wooden or silicone spatula
Keeping your starter healthy means feeding it regularly. You should feed it at the same time every day. This involves throwing away some starter and adding fresh flour and water. This keeps the starter strong and prevents it from getting too sour.
| Starter Age | Feeding Frequency | Room Temperature |
|---|---|---|
| 0-7 Days | Daily | 70-80°F |
| 1-2 Weeks | Every 12-24 hours | 70-75°F |
| Mature Starter | Weekly (if refrigerated) | 40-50°F |
Look for these signs of a healthy starter: it should bubble, smell sour, and rise predictably. A mature starter will grow in size in 4-8 hours after feeding. This means it’s ready to make bread rise.
Pro tip: Always use room temperature ingredients and maintain a consistent feeding routine for the best results.
Essential Ingredients for Sourdough Sandwich Bread
Making the perfect sourdough sandwich bread begins with knowing the key ingredients. Each one is important for flavor, texture, and structure. Let’s explore the main ingredients that make your bread special.
Choosing the Right Flour
Bread flour is the base of a great sourdough sandwich bread. It has more protein than all-purpose flour, which makes the gluten stronger. This strength gives your bread a better structure and a chewy texture.
- High-protein bread flour provides superior structure
- Look for unbleached, unbromated flour for best results
- Whole wheat or rye flour can add complexity to your recipe
Understanding Hydration Levels
The hydration ratio is key for your sourdough’s texture and crumb. It shows how much water you use compared to flour. A good hydration for sandwich bread is 70-80%, making it soft and easy to slice.
- Lower hydration (65-70%): Denser, more compact bread
- Higher hydration (75-80%): Softer, more open crumb
- Experiment to find your ideal hydration ratio
Additional Ingredients and Their Purpose
Flour, water, and salt are the basics of sourdough. But, adding honey and oil can make your bread even better. Honey adds sweetness, and oil makes the crust softer and the crumb tender.
- Salt: Enhances flavor and controls fermentation
- Honey: Provides subtle sweetness and feeds yeast
- Oil: Improves texture and extends shelf life
Pro tip: Always use room temperature ingredients for consistent results in your sourdough sandwich bread.
Preparing Your Sweet Levain
Making a sweet levain is key to a tasty sourdough sandwich bread. It changes the bread’s flavor, adding depth and complexity. Preparing the sweet levain needs precision and attention to detail.
To make your sweet levain, mix important ingredients for good fermentation. You’ll combine your active sourdough starter with flour, water, and a bit of sugar. This creates a lively pre-ferment.
- Start with a mature sourdough starter
- Select high-quality bread flour
- Use filtered or spring water
- Add a small amount of sugar to boost fermentation
The fermentation time for your sweet levain is 10-12 hours. This depends on the temperature and starter activity. Keep the temperature between 70-75°F for the best results.
| Ingredient | Quantity | Purpose |
|---|---|---|
| Active Sourdough Starter | 50g | Provides fermentation activity |
| Bread Flour | 100g | Builds structure and flavor |
| Water | 100g | Hydrates ingredients |
| Sugar | 10g | Enhances fermentation |
Look for signs of a mature sweet levain. It should smell sour, bubble a lot, and double in size. This means it’s ready to mix into your sourdough sandwich bread dough.
Mixing and Kneading the Sourdough
Learning how to knead sourdough is key to making a great sandwich bread. Mixing and kneading turn your ingredients into a tasty, well-shaped loaf. Knowing how to develop the dough will make your bread look and taste like it was made by a pro.
Proper Mixing Techniques
Start by mixing your sourdough ingredients slowly. Here’s how to mix them right:
- Begin with a gentle mix to hydrate the flour
- Let the dough rest for 30 minutes (autolyse method)
- Add your starter and salt carefully
- Use gentle folding instead of hard kneading
Signs of Well-Developed Dough
Knowing when your dough is ready is crucial. Look for these signs while kneading:
- It should feel smooth and elastic
- Pass the windowpane test (thin, clear when stretched)
- The dough should keep its shape without spreading
- It should feel slightly resistant when pulled
Common Mixing Mistakes to Avoid
Staying away from common mistakes can greatly improve your sourdough. Watch out for these issues:
- Don’t overmix, as it can ruin the gluten
- Avoid undermixing, which leads to uneven dough
- Use water at the right temperature
- Don’t skip the resting time between mixing steps
Pro tip: Pay attention to your dough’s texture and be patient during mixing. Making great sourdough takes practice and careful watching.
Bulk Fermentation Process
Sourdough fermentation is key in bread making. It turns your dough into a tasty, well-structured loaf. During this time, your dough gets complex flavors and becomes stronger.
The bulk fermentation lasts 4-5 hours at 76-78°F. This lets your sourdough develop its tangy taste and better structure. Keeping the temperature right is important for good fermentation.
- Monitor dough temperature carefully
- Look for visible signs of fermentation
- Perform periodic stretch and fold techniques
- Recognize when bulk rise is complete
To check if your dough is ready, use the finger-poke test. Press your finger into the dough. If it springs back slowly and leaves a mark, it’s ready. The dough should look puffy, feel light, and airy.
Pro tip: Cooler temperatures slow down fermentation, while warmer environments speed up the process. Adjust your kitchen conditions to control your sourdough’s development.
Different climates affect sourdough fermentation. In warm places, fermentation might be faster. In cooler areas, it could take longer. Learn to understand your dough’s needs.
Shaping Your Sourdough Sandwich Bread
Mastering sourdough bread shaping is key to making a beautiful and tasty loaf. This process turns your fermented dough into a structured, appealing sandwich bread. It will impress both new and seasoned bakers.
Proper sourdough bread shaping needs patience and practice. You aim to create surface tension. This helps the bread rise evenly and develop a beautiful crumb structure.
Step-by-Step Shaping Technique
- Gently remove the bulk fermented dough from the container
- Lightly dust your work surface with flour to prevent sticking
- Stretch and fold the dough to create initial tension
- Use a bench scraper to help manage sticky dough
Creating the Perfect Loaf Structure
Preparing your loaf pan is crucial for successful sourdough sandwich bread. Choose a high-quality non-stick loaf pan for even heat.
- Pre-grease your loaf pan with butter or oil
- Gently shape the dough into a rectangular form
- Fold the edges into the center, creating tight surface tension
- Roll the dough into a compact cylinder
- Place the shaped dough seam-side down in the prepared loaf pan
Professional bakers say careful handling during sourdough bread shaping greatly improves your bread’s texture and look. Take your time and practice these techniques to get better.
Proofing and Temperature Control
Mastering sourdough proofing is key to making the perfect sandwich bread. The final proofing stage turns your dough into a light, airy loaf. This will make your taste buds happy. Managing dough temperature is very important for good results.
When proofing, keep an eye on a few important things:
- Ideal temperature range: 76-85°F for best fermentation
- Typical proofing time: 4-8 hours
- Visual signs of when it’s ready
The finger-poke test is a great way to check if your dough is ready. Press your finger into the dough – if it springs back slowly and leaves a small dent, it’s ready. If it bounces back quickly, it needs more time. If it doesn’t spring back, it’s over-proofed.
Temperature control is crucial for your sourdough sandwich bread. Warmer places make it rise faster, while cooler places slow it down. Here are some tips to control your dough’s environment:
- Make a warm spot near a pilot light
- Use a proofing box for steady temperature
- Watch the dough until it goes over the pan’s edge
Look for signs of good proofing: the dough should go over the pan’s edge and look puffy and light. With practice, you’ll get better at knowing when and how to control the temperature and timing.
Baking Perfect Sourdough Sandwich Bread
To make a tasty sourdough sandwich bread, you need to get the baking right. The temperature and how the crust forms are key. They can turn a good loaf into an amazing one.
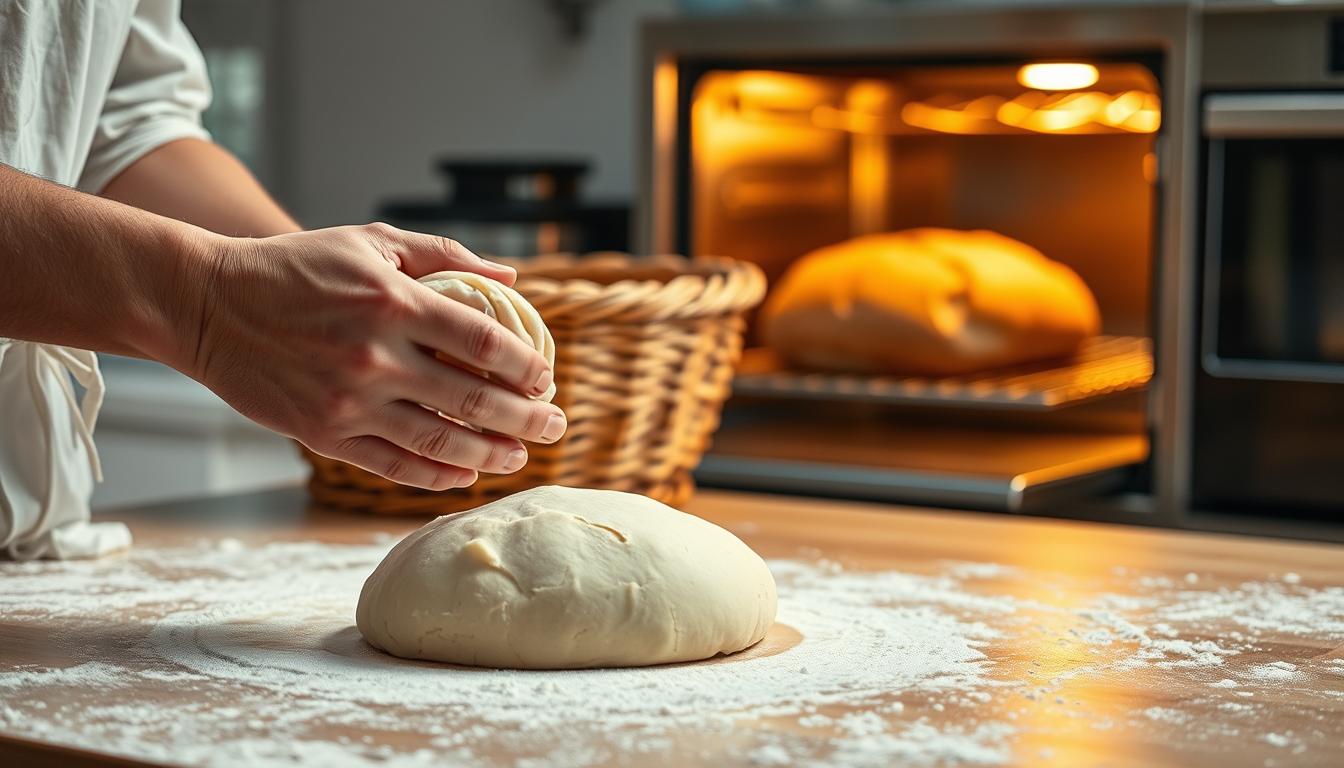
Learning how to bake sourdough is all about temperature and steam. Your oven is a key tool for making it just like the pros.
Optimal Oven Temperature Settings
Finding the best baking temperature is important. Most home bakers get great results with these settings:
- Preheat your oven to 450°F first
- Then, lower it to 350°F after 10 minutes
- Bake for about 35-40 minutes total
Steam and Crust Development Techniques
Steam is crucial for a great crust in the first part of baking. Bakers use a few ways to add steam at home:
- Put a cast-iron pan with water on the bottom rack
- Spray water into the oven during the first 10 minutes
- Use a Dutch oven with a lid for the first part of baking
| Baking Stage | Temperature | Duration | Steam Method |
|---|---|---|---|
| Initial Burst | 450°F | 10 minutes | Maximum steam |
| Main Baking | 350°F | 30-35 minutes | Reduced steam |
Use a digital thermometer to check the bread’s inside. It should be 190-200°F for a fully cooked, tasty loaf.
Storage and Shelf Life Tips
Learning how to store sourdough bread is key to keeping it fresh. The right storage methods help preserve the bread’s taste and texture. This way, you can enjoy every slice to the fullest.
Let your sourdough cool down completely before storing it. Room temperature is best for short-term storage. With the right techniques, your bread can stay fresh for about 5 days.
- Store bread in a paper bag or bread box at room temperature
- Avoid plastic bags, which can trap moisture and accelerate spoilage
- Keep bread away from direct sunlight and heat sources
To keep bread fresh for longer, freezing is a great option. Wrap it tightly in plastic wrap, then in a freezer-safe bag. Frozen sourdough stays good for up to 3 months.
Here’s how to thaw your bread:
- Take the bread out of the freezer and let it thaw at room temperature
- Don’t microwave it, as it can become tough
- To refresh stale bread, warm it in the oven at 350°F for 5-10 minutes
Watch for mold or an off smell to know if the bread has gone bad. Proper storage is an art that lets you enjoy your homemade sourdough for days.
Troubleshooting Common Issues
Sourdough baking can be tricky for home bakers. Knowing how to fix bread texture problems is key to making perfect loaves. Even skilled bakers face challenges that can affect their sourdough sandwich bread.
Several common issues can affect your sourdough’s texture and rise. Spotting these problems early helps you fix them quickly and improve your baking.
Addressing Dense or Gummy Texture
Dense or gummy bread often comes from baking mistakes. Here are the main reasons and fixes:
- Underproofed dough: Makes bread heavy and compact
- Overproofed starter: Hurts the bread’s rise
- Low hydration: Makes bread dense
- Not enough kneading: Stops gluten from forming
Fixing Rising Problems
Rising issues can stop your sourdough sandwich bread project. Here’s how to solve common problems:
| Problem | Potential Cause | Solution |
|---|---|---|
| No rise | Inactive starter | Refresh starter, ensure warm environment |
| Slow rise | Cold temperature | Create warm proofing space |
| Uneven rise | Inconsistent starter | Maintain regular feeding schedule |
Professional bakers know that fixing sourdough issues takes patience and practice. Each batch teaches you something new about bread texture problems and how to make the perfect loaf.
Conclusion
Mastering sourdough baking turns your kitchen into a home bakery. You’ve learned how to make delicious, nutritious sandwich bread from scratch. This skill goes beyond just following a recipe. It connects you to the rich tradition of baking.
Artisan bread at home is more than a hobby. It lets you control what goes into your bread, making it healthier and tastier. Every loaf you make is a personal victory. Your sourdough sandwich bread is a healthier choice compared to store-bought bread.
Getting better at sourdough baking takes time and effort. Don’t give up, even when things don’t go as planned at first. Each time you bake, you learn something new. Try different flours, water amounts, and proofing times to find your unique sourdough style.
Your sourdough adventure is just starting. Enjoy the journey and the tasty bread you make. With patience and passion, you’ll turn simple ingredients into amazing artisan bread. Your family and friends will love it.
FAQ
What is a sourdough starter, and why is it essential for making sourdough bread?
A sourdough starter is a mix of flour and water with wild yeast and bacteria. It’s key for sourdough bread because it leavens naturally, adds complex flavors, and gives it a tangy taste. Unlike commercial yeast, it needs regular feeding to stay alive and active.
How long does it take to make a sourdough sandwich bread from start to finish?
Making sourdough sandwich bread takes 24-36 hours. This includes starter prep, levain development, mixing, fermentation, proofing, and baking. Most of this time is spent waiting for the dough to ferment, which improves flavor and digestibility.
Can I make sourdough bread without a stand mixer?
Yes, you can make sourdough bread by hand. Traditional bakers have done this for centuries. You’ll need to knead well and be ready to put in time and effort to develop the dough’s gluten.
How do I know if my sourdough starter is healthy and active?
A healthy starter doubles or triples in 4-8 hours after feeding. It should smell slightly sour and have lots of bubbles. If it floats in water, it’s ready to leaven bread. If it looks slow or smells bad, it might need more feeding or a better environment.
What type of flour works best for sourdough sandwich bread?
Bread flour with 12-14% protein is best for sourdough sandwich bread. It helps create strong gluten, leading to better structure and rise. While all-purpose flour works, bread flour will give you a more consistent loaf.
How long can I store homemade sourdough sandwich bread?
Homemade sourdough stays fresh for 3-5 days at room temperature. For longer storage, freeze it for up to 3 months. Always cool the bread completely before storing to prevent mold.
Why is my sourdough bread dense or gummy?
Dense or gummy bread can come from several issues. These include under-proofed dough, weak gluten, inactive starter, or wrong hydration. Make sure your starter is active, knead well, ferment enough, and cool the bread completely before cutting.
Can I make sourdough bread without a Dutch oven?
Yes, you can bake sourdough in a regular loaf pan or on a baking sheet. A Dutch oven helps with steam and even heat, making the crust crispier. If you don’t have one, use a pan of hot water in the oven to create steam.