
How to Make Perfect Cut Out Sugar Cookies at Home
Every holiday, my grandmother’s kitchen became a magical cookie workshop. The smell of butter and vanilla filled the air as we made perfect cut out sugar cookies. These memories sparked my love for making delightful, picture-perfect sugar cookies.
These cookies are not just a treat; they’re a canvas for creativity. They’re perfect for birthdays, holidays, or any special moment. Whether you’re new to baking or experienced, this simple recipe will impress everyone.
Table of Contents
Key Takeaways
- Master the art of creating professional-looking cut out sugar cookies
- Learn techniques for achieving crisp edges and perfect shapes
- Discover tips for consistent cookie texture and flavor
- Understand the science behind successful cookie baking
- Explore versatile decorating options for any occasion
Essential Ingredients for Perfect Sugar Cookies
Making great sugar cookies begins with the right ingredients. Each part of the cookie is crucial for taste and looks. Knowing what each ingredient does will help you make cookies that are tasty and pretty.
Quality Butter Selection and Preparation
Unsalted butter is key for top-notch sugar cookies. Choose high-quality butter with lots of butterfat. Soften the butter at room temperature for 30-45 minutes before mixing. This makes the dough smooth and even.
- Use fresh, high-quality unsalted butter
- Let butter soften at room temperature
- Avoid melted or cold butter
Flour and Leavening Agents
All-purpose flour is the base of your sugar cookies. Sift the flour to get rid of lumps and mix evenly. Baking powder makes the cookies rise and gives them a soft texture.
| Ingredient | Purpose | Recommended Amount |
| All-Purpose Flour | Provides structure | 2 1/4 cups |
| Baking Powder | Helps cookies rise | 1 1/2 teaspoons |
Flavor Enhancers and Extracts
Vanilla extract is a classic flavor booster for sugar cookies. Adding a bit of almond extract can make your cookies even more special. These flavors can turn simple cookies into treats that wow your taste buds.
Pro tip: Always use pure vanilla extract for the most authentic flavor in your sugar cookies.
Tools and Equipment You’ll Need
Making perfect cut out sugar cookies needs the right kitchen tools. Setting up your workspace with the right equipment makes baking fun and easy. Make sure you have everything ready before mixing your dough.
- Electric Stand Mixer: Ensures smooth and consistent dough mixing
- Sturdy Baking Sheets: Provides even heat distribution
- Silicone Baking Mats or Parchment Paper: Prevents sticking and easy cleanup
- Rolling Pin: Critical for achieving uniform cookie thickness
- Precise Cookie Cutters: Shapes your delightful sugar cookies
Choose quality tools that will last. A good electric mixer helps control dough texture. Stainless steel baking sheets ensure even heat, preventing burnt edges.
| Tool | Purpose | Recommended Type |
| Electric Mixer | Blend ingredients thoroughly | Stand mixer with paddle attachment |
| Rolling Pin | Create uniform dough thickness | Wooden or marble with adjustable rings |
| Cookie Cutters | Shape cookies precisely | Stainless steel with comfortable handles |
The right tools make your cut out sugar cookies special. Take your time to pick equipment that makes baking easier and more fun.
The Science Behind Cut Out Sugar Cookies
Baking perfect sugar cookies is more than just following a recipe. It’s a delicate science that combines chemistry, physics, and culinary art. Knowing the science behind sugar cookies can make your baking go from good to extraordinary.
When you bake sugar cookies, many scientific principles are at work. The way ingredients mix together affects the cookie’s texture, taste, and look.
Understanding Dough Consistency
Dough consistency is key to making amazing sugar cookies. How you mix the ingredients changes the cookie’s texture and structure. Mixing right adds air to the butter and sugar, making the cookie light and tender.
- Creaming butter and sugar introduces microscopic air bubbles
- Overmixing can develop excess gluten, resulting in tough cookies
- Precise ingredient measurements ensure consistent results
Temperature Control Importance
Temperature is very important when baking sugar cookies. Chilling the dough stops it from spreading too much during baking. This helps keep the shapes you cut out.
Cold dough = Crisp, well-defined cookie shapes
Chemical Reactions During Baking
Baking sugar cookies triggers interesting chemical changes. Heat causes proteins to change, starches to gel, and sugars to caramelize. This creates complex flavors and a golden-brown color.
- Protein structures set the cookie’s framework
- Caramelization develops rich, deep flavors
- Maillard reactions create appealing brown color
By understanding these scientific principles, you can make your sugar cookies into culinary wonders. They will impress both the eye and the taste buds.
Step-by-Step Mixing Process
Making the perfect simple sugar cookie recipe begins with knowing the right mixing techniques. The secret to tasty cut-out sugar cookies is in how you mix your ingredients. Good mixing leads to a tender, flavorful cookie that will make your taste buds happy.
Start by creaming your butter and sugar together. This step is key for a light and fluffy texture. Use room temperature butter and mix it with granulated sugar until it’s pale and creamy. This step adds air to the dough, making the cookie softer.
- Cream butter and sugar until light and fluffy (about 3-4 minutes)
- Add eggs one at a time, mixing thoroughly after each addition
- Mix in vanilla extract for enhanced flavor
- Gradually add dry ingredients to prevent overmixing
When adding dry ingredients, be gentle. Overmixing can make cookies tough. Slowly add flour, salt, and baking powder until just mixed. The dough should be smooth but not too worked.
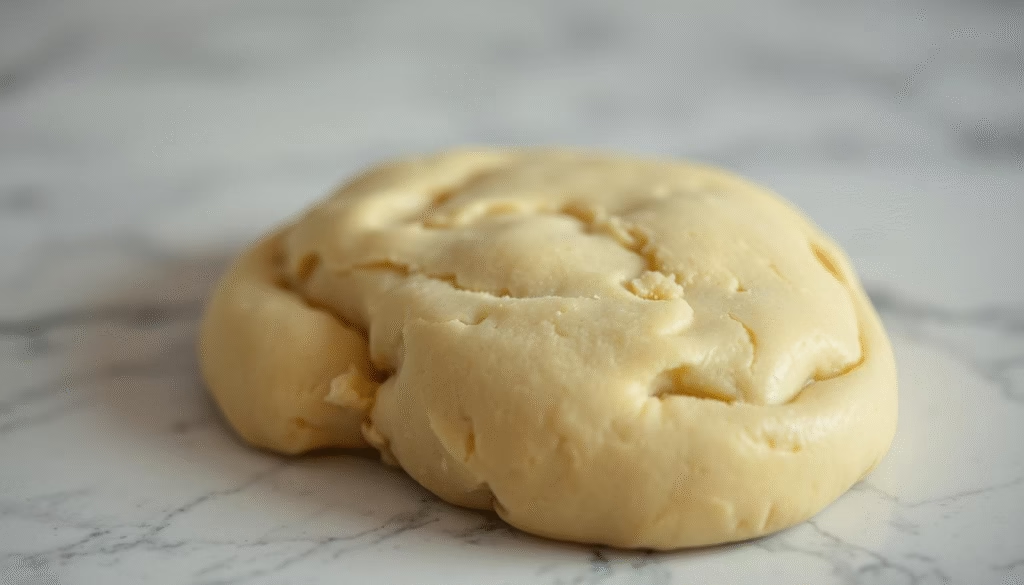
The last important step is chilling your cookie dough. Wrap the dough in plastic wrap and chill for at least an hour. Chilling stops the dough from spreading and makes rolling out easier. Your patience will pay off with perfectly shaped, tasty sugar cookies.
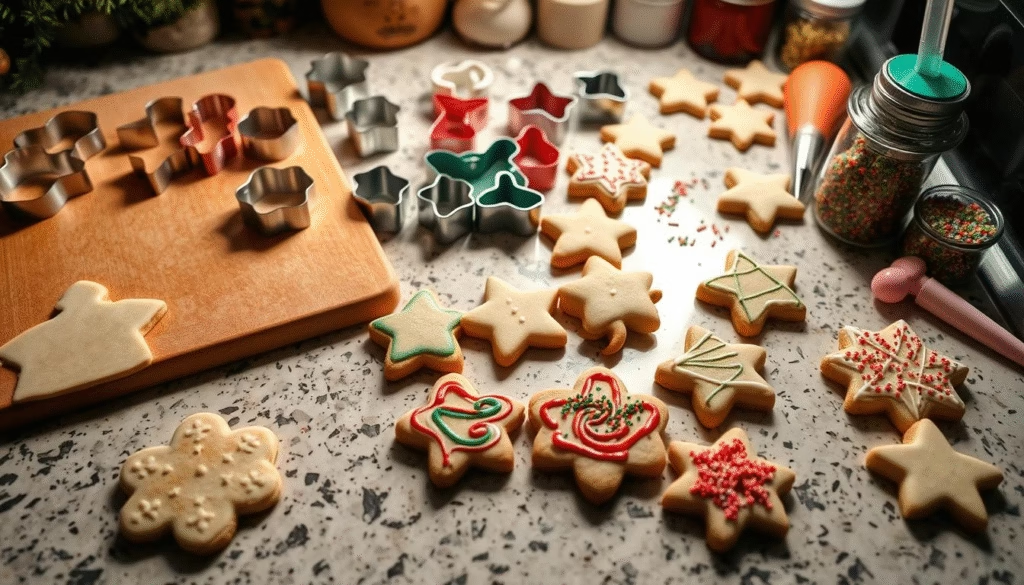
Rolling and Cutting Techniques for Perfect Shapes
Making stunning christmas cutout cookies needs precision and skill. The right techniques can turn your baking into something amazing. Each cookie will look professional and delightful.
Learning to roll christmas cutout cookies is key. You need to know a few important things. The dough’s consistency and how you handle it are crucial for perfect shapes.
Proper Rolling Thickness
Getting the dough thickness right is essential for perfect cookies. Here’s what to do:
- Roll dough to a consistent 1/4 inch thickness
- Use a ruler or rolling pin with thickness rings for precision
- Work on a lightly floured surface to prevent sticking
- Rotate dough frequently to ensure even thickness
Cookie Cutter Best Practices
Choosing and using cookie cutters right can greatly improve your cookies:
- Dip cookie cutters in flour before each cut to prevent sticking
- Press firmly and lift straight up for clean edges
- Clean cutters between uses to maintain sharp shapes
- Use metal cutters for more precise cuts
Pro tip: Keep your workspace cool and work quickly. If the dough gets too soft, refrigerate it for 10-15 minutes before you continue.
Chilling and Storage Methods
Chilling cut out sugar cookies is key for perfect shapes and textures. Refrigeration stops the dough from spreading during baking. It lets the fats solidify and the gluten relax, keeping your cookies’ shapes sharp.
- Wrap the dough tightly in plastic wrap
- Flatten the dough into a disc for even cooling
- Refrigerate for a minimum of 1 hour before rolling
- Use parchment paper between dough layers
For long-term storage, you can freeze cut out sugar cookie dough. It stays good in the freezer for up to 3 months. Just thaw it in the fridge overnight when you’re ready to bake.
| Storage Method | Duration | Recommended Technique |
| Refrigerator | Up to 3 days | Wrapped in plastic, sealed container |
| Freezer | Up to 3 months | Tightly wrapped, labeled with date |
Pro tip: Always label your stored dough with the date to track freshness. When thawing frozen cut out sugar cookies dough, keep it in the refrigerator. This helps keep its texture and prevents bacterial growth.
Baking Temperature and Timing Guidelines
Getting your sugar cookies just right needs careful baking. The right temperature and timing make all the difference. Your cut-out cookies will go from good to amazing.
Perfect sugar cookies come from knowing your oven and controlling the temperature. Professional bakers say consistent heat is key. It makes your cookies look and taste great.
Optimal Oven Temperature Settings
The best baking temperature for sugar cookies is between 350-375°F (177-190°C). This range helps your cookies bake evenly and prevents burning.
- Preheat your oven completely before baking
- Use an oven thermometer for accuracy
- Place cookies in the center rack for consistent heating
Decoding Cookie Doneness
Knowing when your sugar cookies are done takes time. Look for signs that show they’re ready to come out of the oven.
| Doneness Indicator | Visual Cue | Baking Time |
| Edges | Light golden brown | 8-12 minutes |
| Center | Slightly firm | Remove when set |
| Color | Uniform pale yellow | No dark brown spots |
Cookie thickness affects baking time. Thinner cookies bake quicker, while thicker ones need more time. Watch your first batch closely to find the right time for your recipe.
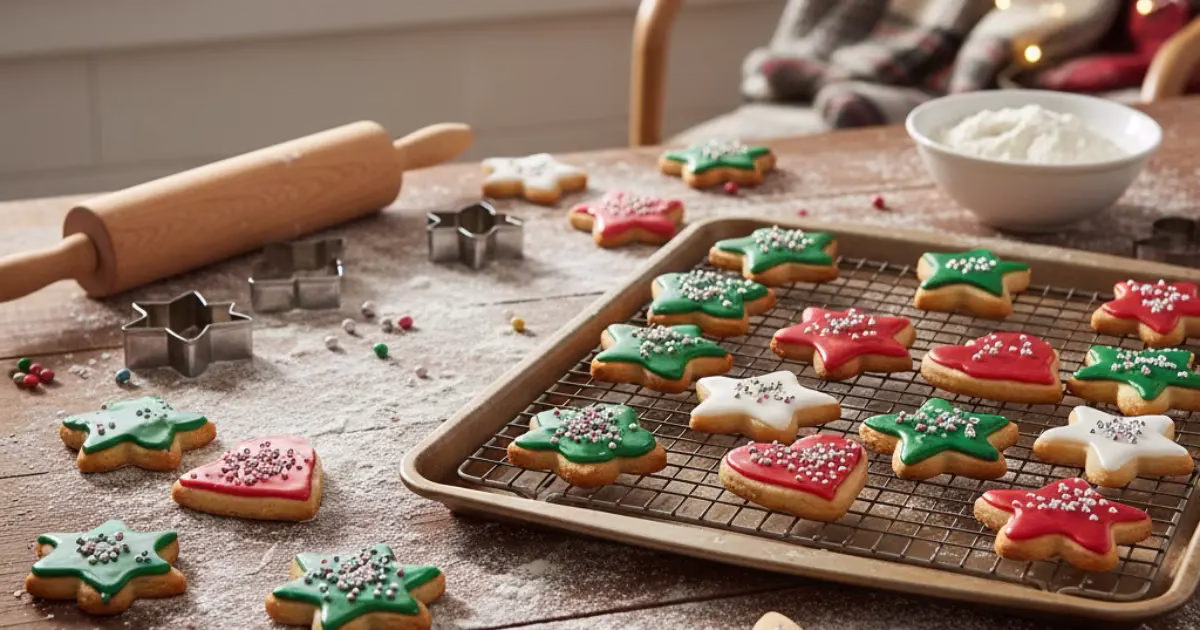
Decorating Your Cut Out Sugar Cookies
Turning plain sugar cookies and icing into festive treats is an art. It brings joy to holiday baking. Decorating Christmas cutout cookies requires preparation for stunning results.
Make sure your sugar cookies are cool before decorating. Warm cookies can make icing melt and ruin your design. You can choose from royal icing, easy cookie icing, or buttercream for decorating.
Your decorating toolkit should include:
- Offset spatula
- Food-safe brushes
- Piping bags
- Decorative sprinkles
For Christmas cookies, try festive techniques like flooding and adding glitter. Use colors like red and green, or silver and white to capture holiday spirit.
Pro tip: Use toothpicks to help spread icing and create precise designs on your sugar cookies.
Decorating sugar cookies takes practice. Let your creativity shine in each unique design!
Storage and Shelf Life Tips
Keeping your homemade cut out sugar cookies fresh is key. The right storage keeps them tasty and soft for a long time. This way, you can enjoy them for days or even months.
Proper storage is crucial for your freshly baked cookies. It keeps them away from moisture and air. This helps preserve their flavor and texture.
Room Temperature Storage Techniques
For short-term storage, follow these tips:
- Use an airtight container with a tight-fitting lid
- Place parchment paper between cookie layers to prevent sticking
- Store at room temperature for up to 5 days
- Keep away from direct sunlight and heat sources
Freezing Your Cut Out Sugar Cookies
Freezing is great for keeping cookies fresh for a long time. Here’s how to do it right:
- Allow cookies to cool completely before freezing
- Wrap individual cookies or layers in plastic wrap
- Place wrapped cookies in a freezer-safe container
- Store in the freezer for up to 3 months
Pro tip: Undecorated cookies freeze better than decorated ones. If possible, freeze cookies before adding intricate icing or decorations.
When you’re ready to eat your frozen cookies, just thaw them at room temperature. It takes about 15-30 minutes. This way, they stay soft and flavorful.
Conclusion
Learning to make perfect cut out sugar cookies is a fun journey for everyone. You’ll get better at picking the right ingredients, preparing the dough, and baking. This simple recipe opens up a world of creativity.
Practice is key to becoming a great cookie baker. Every batch you make will help you get better. You’ll soon be making cookies that are uniquely yours, with different shapes and flavors.
Baking is both an art and a science. The skills you’ve learned will help you with more than just sugar cookies. Whether it’s for a holiday or a simple treat, your cookies will always impress.
Enjoy the joy of baking and let your creativity show in every cookie. Your baking journey is just starting, and the possibilities are endless.
FAQ
How long can I store cut out sugar cookies?
You can keep undecorated sugar cookies in an airtight container at room temperature for up to 1 week. Decorated cookies with royal icing can last 2-3 weeks if stored properly. For longer storage, freeze both decorated and undecorated cookies for up to 3 months.
Can I make the cookie dough ahead of time?
Yes, you can make the cookie dough ahead and refrigerate it for up to 3 days before baking. For longer storage, freeze the dough for up to 3 months. Just wrap it tightly in plastic wrap and put it in a freezer-safe bag.
What’s the best way to prevent my cut out cookies from spreading?
Chilling the dough is key to preventing spread. After cutting out your shapes, refrigerate the cookie sheets for 10-15 minutes before baking. This helps keep the cookies’ shape and prevents them from spreading too much during baking.
Can I use margarine instead of butter?
You can use margarine, but unsalted butter is better for flavor and texture. Margarine has more water, which can change the cookie’s consistency and taste. If you must use margarine, choose a high-fat stick.
How thick should I roll out my sugar cookie dough?
Roll your dough to about 1/4 inch thickness for the best results. This gives you a soft center with crisp edges. Use guides or dowels to keep the dough even across all cookies.
What’s the best icing for decorating cut out cookies?
Royal icing is the top choice for decorating cut out cookies. It dries hard and smooth, perfect for detailed designs. For simpler designs, you can use easy cookie icing or buttercream, but they won’t offer the same level of detail.
How do I prevent my cookies from breaking when transferring them?
Use a thin, offset spatula to transfer the cut-out shapes to your baking sheet. Work with chilled dough. If a shape breaks, gently press it back together. Always handle the cookies gently and let them cool completely before decorating.
Can I add food coloring to my sugar cookie dough?
Yes, you can add gel food coloring to the dough during mixing. Gel colors are better as they don’t change the dough’s consistency as much as liquid colors. Start with a small amount and add more as needed to get your desired color.