
Homemade Oatmeal Cream Pies Recipe
There’s something uniquely satisfying about biting into a soft, chewy oatmeal cookie that’s been generously sandwiched with smooth vanilla buttercream filling. It’s the kind of treat that brings back memories for a lot of us, though homemade versions are infinitely better than anything you’ll find on a store shelf.
Table of Contents
A Nostalgic Beginning with Homemade Oatmeal Cream Pies Recipe
I grew up absolutely loving those individually wrapped oatmeal cream pies you’d find in the snack aisle. My mom would occasionally toss a package into our shopping cart, and I’d save them for special occasions or that mid-afternoon slump when I needed a little pick-me-up. When I got to college, they made their way onto my dorm room shopping list with reliable consistency. There was something about their portability and familiarity that just worked.
It wasn’t until years later that I actually started reading the ingredient list on the back of the packaging. Once I did, I realized that what I thought was a simple treat contained quite a lot of things I couldn’t easily pronounce or recognize. That’s when I stopped buying them entirely and started experimenting in my own kitchen instead.
The turning point came unexpectedly. I was walking through a farmer’s market a few summers ago and spotted a local bakery’s booth featuring oatmeal cream pies that were literally the size of my face. These weren’t the small, individually portioned snacks I remembered. These were substantial, impressive, handcrafted creations that made me immediately want to recreate them at home. That one moment of inspiration sparked a baking journey that led to perfecting this recipe, and I’m thrilled to share it with you.
Why You’ll Absolutely Love Homemade Oatmeal Cream Pies
Size and Structure That Actually Impresses
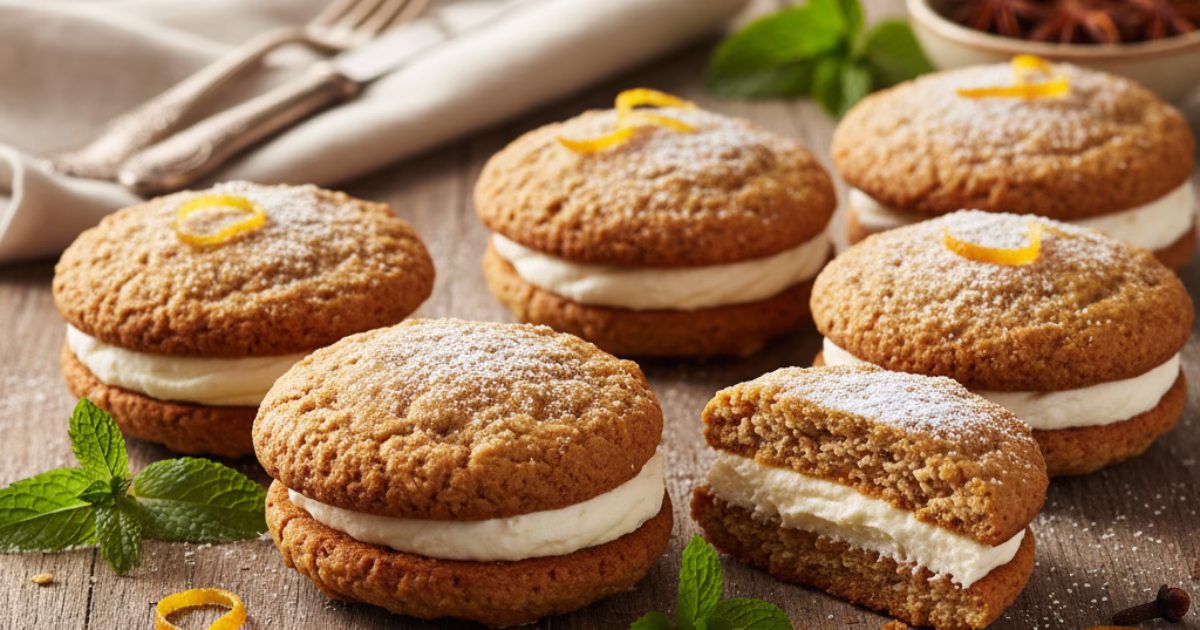
The first thing you’ll notice about homemade oatmeal cream pies is their sheer size compared to the mass-produced versions. We’re talking generously proportioned cookies that feel substantial in your hand and look genuinely impressive on a plate. Bigger really is better when it comes to these treats, and there’s no reason to settle for miniature versions when you’re doing the work yourself anyway.
The Perfect Texture and Flavor Balance
What makes these homemade pies absolutely special is the texture contrast. The cookies have a slightly crisp exterior that gives way to a perfectly chewy center, thanks to the combination of brown sugar and old-fashioned oats. Paired with that generous layer of smooth, fluffy vanilla buttercream filling, you get a cookie experience that rivals anything available commercially. The vanilla filling is rich without being overwhelming, and the proportions are generous enough to make every bite feel indulgent.
The Ultimate Potluck and Picnic Companion
If you’re looking for a dessert that travels well and impresses a crowd, these oatmeal cream pies are your answer. They hold up beautifully during transport, they’re easy for guests to grab and enjoy without utensils, and they have a way of making you look like a genuine baking hero. Whether you’re heading to a summer picnic, a neighborhood potluck, or a casual gathering with friends, bringing a batch of these guarantees they’ll disappear quickly and people will be asking for the recipe.
You Actually Know What’s In Them
Perhaps the most underrated benefit of making these at home is knowing exactly what goes into every single bite. No mysterious additives, no preservatives with unpronounceable names, no corn syrup from a processing facility you’ll never visit. You’re working with real butter, genuine vanilla, wholesome oats, and simple flour. It’s genuinely a win when you stack that up against what’s typically found on the ingredient list of store-bought versions.
How to Make These Homemade Oatmeal Cream Pies
Gathering Your Ingredients
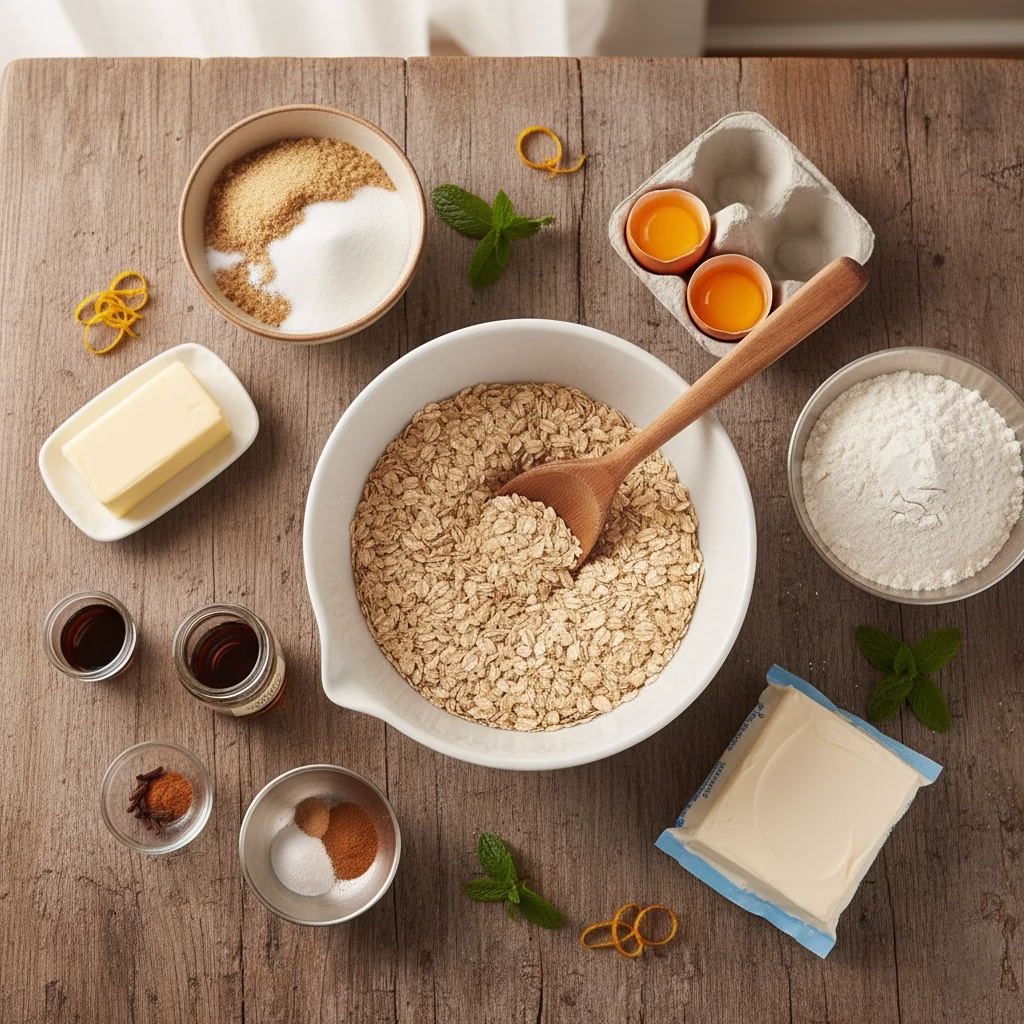
For the cookies, you’ll want unsalted butter, brown sugar (which contributes to that perfect chewy texture), granulated sugar, eggs, vanilla extract, all-purpose flour, baking soda, salt, and old-fashioned rolled oats. The old-fashioned oats are particularly important here—they contribute more texture and chewiness than quick oats would.
When it comes to measuring your flour, spoon it into your measuring cup and level it off with a knife rather than scooping directly from the bag. This prevents you from packing too much flour into your dough, which is a common mistake that leads to dry cookies. If your brown sugar has hardened, soften it by placing it in a microwave-safe bowl with a damp paper towel for about twenty seconds. This makes it far easier to work with.
For the cream filling, keep things simple with softened unsalted butter, confectioners’ sugar, vanilla extract, and a splash of milk. The milk is key because it gives the filling the perfect consistency—too thick and it’s hard to pipe, too thin and it won’t hold its shape between the cookies.
Making the Cookie Dough
Begin by creaming together your softened butter and sugars for a full three minutes. This longer creaming time is what incorporates air into the dough and contributes to that desirable chewy texture. You’ll know you’re done when the mixture is noticeably lighter in color and fluffy in appearance.
In a separate bowl, whisk together your flour, baking soda, and salt. This step ensures even distribution of your leavening agents. Beat your eggs and vanilla into the creamed butter mixture, then gradually add your flour mixture while mixing on low speed. Finally, stir in your oats until they’re evenly distributed throughout the dough. The mixture should come together without being overworked.
Baking Your Cookies
Using a three-tablespoon cookie scoop (the larger size), drop portions of dough onto your prepared baking sheets, spacing them about two inches apart. These larger scoops are what give you those impressively sized cookies. If you prefer smaller cookies, use a one and a half tablespoon scoop instead. Bake at 350°F for approximately twelve to fifteen minutes, until the edges are just beginning to set but the centers still look slightly underbaked. This is crucial—it’s what keeps them chewy.
Allow the cookies to cool on the baking sheet for five minutes before transferring them to a wire rack. This brief window on the pan helps them firm up just enough to handle without falling apart, but they’ll continue cooking slightly from residual heat.
Preparing the Cream Filling
Make sure your butter is completely softened to room temperature before starting. Beat it on medium-high speed for about five minutes. This extended beating is what makes the filling incredibly fluffy and light. Gradually add your confectioners’ sugar, a half cup at a time, mixing well between additions. Add your vanilla extract and a tablespoon of milk, then beat for another three to five minutes until you achieve a spreadable consistency. If it’s too thick, add a bit more milk, one teaspoon at a time.
Assembly and Application Tips
Using a small offset spatula or piping bag fitted with a round tip, apply the filling to the flat side of one cookie. Here’s the crucial bit: apply filling only toward the center, leaving approximately one quarter to one half inch around the outer edge. This prevents the filling from squishing out the sides when you press the cookies together, which protects the visual appeal of your finished pies.
Press a second cookie gently on top, flat side down, then set it aside. The filling will firm up slightly as it sits at room temperature.
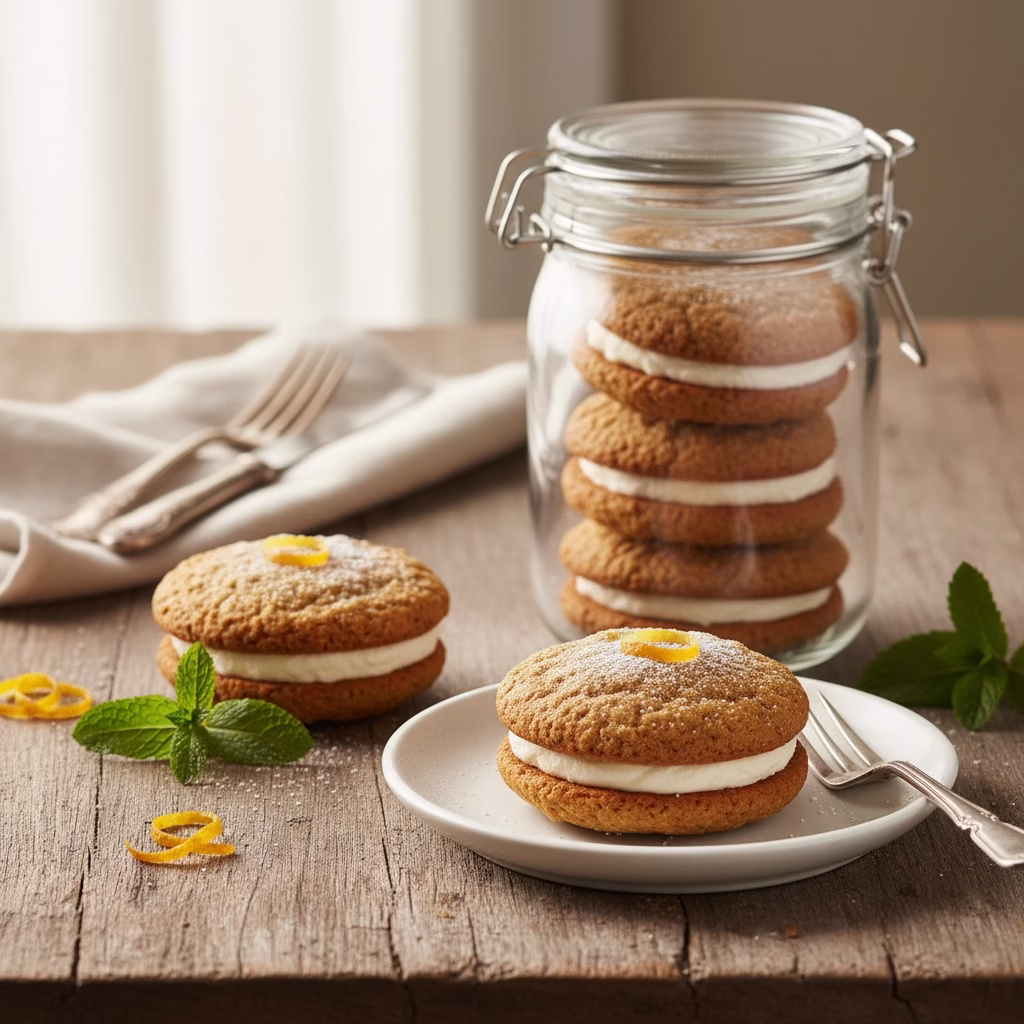
Storage and Serving
Store your finished oatmeal cream pies in an airtight container in the refrigerator for up to three days. When you’re ready to serve them, remove them from the refrigerator about an hour beforehand and let them sit at room temperature. This allows the cookie texture to soften and the filling to reach the ideal consistency.
For freezing, wrap each pie individually in plastic wrap, then place them in a zip-top freezer bag. They’ll keep for up to one month. Thaw them at room temperature for about thirty minutes before serving.
These homemade oatmeal cream pies represent everything that’s wonderful about baking from scratch—better ingredients, superior taste, and the satisfaction of knowing you created something special with your own hands. Your next gathering is going to be absolutely delicious.
There are no reviews yet. Be the first one to write one.