
Make Perfect Jelly Cookies: Easy Recipe & Tips
Every family has a special recipe that brings everyone together. For me, thumbprint cookies are more than just a sweet treat. They bring back memories of baking with my grandmother.
These jelly cookies are a connection to tradition, love, and warm kitchen memories. They’re not just a dessert.
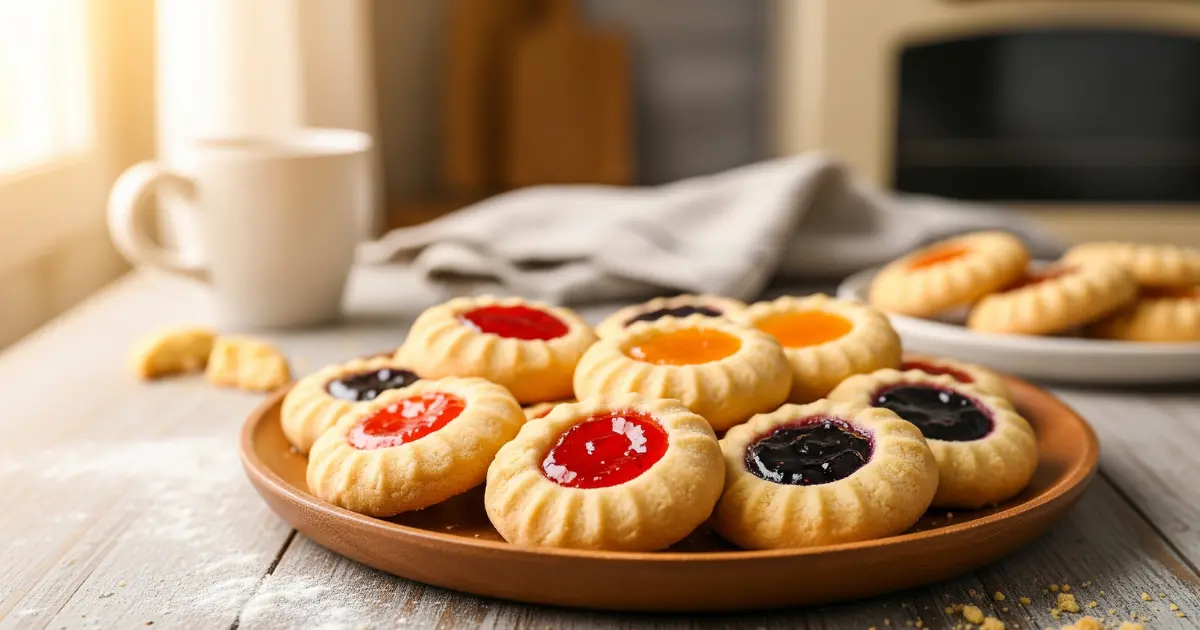
Imagine making perfectly golden jelly cookies that melt in your mouth. They have a vibrant burst of fruity preserve in the center. This guide will help you make the most delicious thumbprint cookies. They’ll impress your family and friends.
Jelly cookies are surprisingly simple to make. They combine buttery shortbread with sweet, fruity filling. This recipe will improve your baking skills and add homemade magic to your kitchen.
Table of Contents
Key Takeaways
- Learn the secrets to perfect thumbprint cookies
- Discover easy techniques for creating professional-quality jelly cookies
- Understand the essential ingredients and tools needed
- Master the art of creating beautiful cookie indentations
- Explore various jelly and preserve filling options
The Classic Appeal of Thumbprint Cookies
Thumbprint cookies have won the hearts of many for years. They are more than just a recipe; they are a tradition that brings families together. This tradition is cherished in kitchens everywhere.
Exploring thumbprint cookies takes us on a journey of flavors and traditions. The recipe has changed, but its charm remains. It creates a special bond with each batch.
Origins of a Beloved Treat
Thumbprint cookies come from Eastern European baking traditions. Countries like Poland and Germany are where they started. Bakers would press their thumb into the dough, making a well for preserves.
- Originated in Eastern European kitchens
- Traditionally made with butter-rich dough
- Designed to showcase homemade fruit preserves
Why Families Cherish These Cookies
Thumbprint cookies are loved because of the fun baking process. Kids enjoy making the indentation, making it a special activity. It’s a way to bond and create memories.
Traditional vs Modern Variations
Classic thumbprint cookies used simple jam fillings. But today, bakers are getting creative. Now, you can find cookies filled with:
- Chocolate ganache
- Nutella
- Specialty fruit reductions
- Cream cheese fillings
The thumbprint cookies recipe has evolved. It keeps these treats popular, blending old traditions with new tastes.
Essential Ingredients for Perfect Jelly Cookies
Making tasty jelly cookies begins with picking the right ingredients. The quality of your raspberry jam cookies depends on what you choose. Using top-notch ingredients is key to their taste and texture.
To make perfect jelly cookies, you need a mix of ingredients that work well together. Here’s what you’ll need:
- Unsalted butter (room temperature)
- Granulated white sugar
- All-purpose flour
- Pure vanilla extract
- Large eggs
- High-quality raspberry jam or fruit preserves
- Salt
When picking ingredients for your raspberry jam cookies, focus on the jam. Choose preserves with real fruit and less sugar. Homemade or artisan jams are best for their rich fruit flavor.
Pro tip: Always use fresh, high-quality ingredients to ensure your cookies taste amazing!
If you have dietary restrictions, here are some substitutions:
- Gluten-free flour for all-purpose flour
- Vegan butter alternatives
- Coconut sugar instead of white sugar
- Sugar-free fruit spreads for lower-sugar options
The quality of your ingredients is crucial for jelly cookies. Spend time choosing fresh, premium ingredients to take your baking to the next level.
Kitchen Tools and Equipment Needed
The right tools are essential for making tasty thumbprint cookies. Whether you’re new to baking or have lots of experience, the right utensils make the process fun and easy.
Starting with the right equipment is key to making perfect thumbprint cookies. Your tools will affect how well your cookies turn out.
Must-Have Baking Tools
- Large mixing bowl for combining ingredients
- Electric mixer or stand mixer
- Baking sheets with non-stick surface
- Parchment paper or silicone baking mats
- Cooling rack for finished thumbprint cookies
- Wooden spoon or rubber spatula
Optional Equipment for Professional Results
These tools can make your thumbprint cookies even better:
- Cookie scoop for uniform cookie sizes
- Digital kitchen scale for precise measurements
- Pastry bag for precise jelly filling
- Decorative piping tips
- Offset spatula for smooth surface work
Measuring Tools and Their Importance
Getting the measurements right is key for thumbprint cookies. Invest in good measuring cups and spoons for consistent results. Measure dry ingredients with dry measuring cups and liquids with liquid measuring cups.
| Measuring Tool | Purpose |
| Dry measuring cups | Flour, sugar, and dry ingredients |
| Liquid measuring cups | Milk, vanilla, and liquid ingredients |
| Kitchen scale | Precise weight measurements |
Choosing the right tools is crucial for making great thumbprint cookies. Good equipment can take your baking from good to amazing.
Step-by-Step Mixing Instructions
Making the perfect thumbprint cookies starts with mixing. You need to mix ingredients well to get the right texture and taste.
Start by creaming butter and sugar in a big bowl. This step is key for a light, tender cookie. Make sure your butter is at room temperature for the best mix. Beat the butter and sugar until they’re pale and fluffy, which takes about 3-4 minutes with an electric mixer.
- Use softened butter at room temperature
- Mix on medium speed until light and creamy
- Make sure to scrape the sides of the bowl for an even mix.
Then, add your eggs one at a time, mixing well after each egg. This makes your cookie base smooth. Slowly add dry ingredients like flour and salt, mixing on low speed to avoid overmixing.
Pro tip: Stop mixing as soon as the flour is just combined to keep your cookies tender and delicate.
Your dough should be soft but not sticky. If it’s too wet, chill it in the fridge for 30 minutes. This lets the flour absorb moisture and makes the dough easier to shape.
Proper Dough Consistency and Handling
Mastering thumbprint cookies starts with the dough’s consistency. The right texture is crucial for success. Your dough should be firm but still easy to shape, preventing crumbling or sticking.
Creating the perfect thumbprint cookies recipe needs careful attention. Pay close attention to ingredient temperatures and mixing methods. Cold ingredients can greatly affect your dough’s quality.
Ingredient Temperature Management
- Keep butter slightly soft but not melted
- Use room temperature eggs for better incorporation
- Chill dough for 30-60 minutes before shaping
Resolving Dough Challenges
When making your thumbprint cookies recipe, you might face dough issues. Here are some solutions:
- Too sticky dough: Add flour gradually, 1 tablespoon at a time
- Crumbly mixture: Incorporate an extra egg yolk
- Inconsistent texture: Ensure ingredients are evenly mixed
“Perfect dough is about balance and patience” – Professional Baker’s Insight
Refrigeration is key for keeping cookie shape. Chilled dough prevents spreading and keeps the thumbprint indentations during baking.
Creating Perfect Cookie Indentations
Mastering thumbprint cookies means getting the indentations right. You can use your thumb or other methods for perfect results.
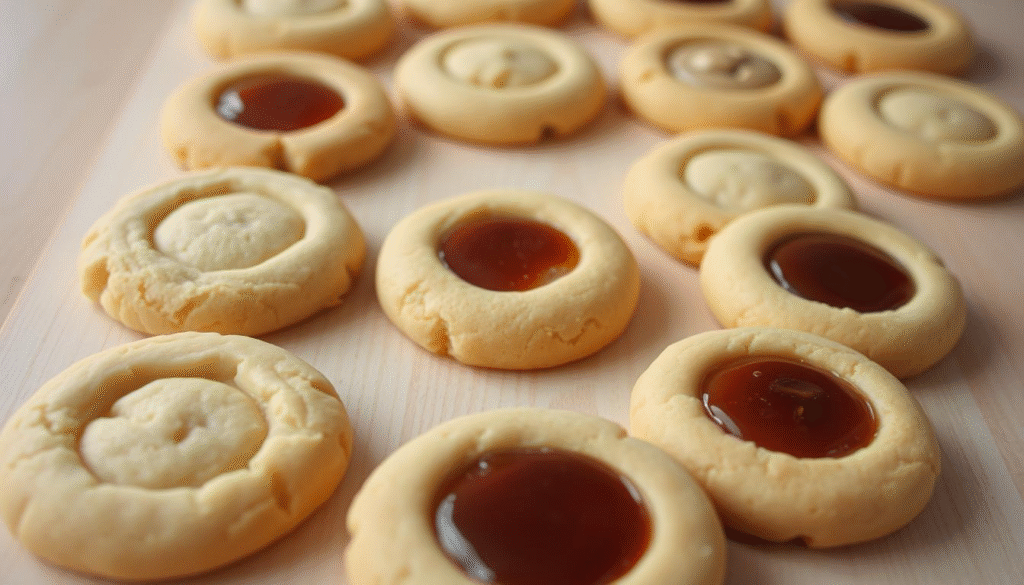
- Use the back of a rounded teaspoon for uniform depth
- Chill dough before creating indentations to prevent cracking
- Wet your thumb or tool slightly to prevent sticking
- Apply gentle, consistent pressure when making impressions
Professional bakers say indentations should be 1/2 inch deep and wide. This lets the jelly fit just right without spilling over.
| Indentation Method | Pros | Cons |
| Thumb Method | Traditional, easy | Less uniform |
| Teaspoon Method | Consistent size, professional look | Requires careful technique |
| Wooden Dowel | Precise depth control | Additional tool needed |
Getting good at thumbprint cookies takes practice. Don’t worry if your first batch isn’t perfect. With time and these tips, you’ll impress everyone with your skills.
Best Jelly Types and Filling Techniques
Choosing the right jelly is key to making tasty raspberry jam cookies. The filling can turn a simple cookie into a special treat. It’s what makes your dessert unforgettable.
- Raspberry preserves: Classic choice with intense fruit flavor
- Strawberry jam: Sweet and traditional option
- Apricot preserves: Tangy alternative for adventurous bakers
- Blackberry jam: Rich and deep fruit taste
Recommended Preserve Varieties
Raspberry jam is the top choice for jelly cookies. It’s thick and has a bright flavor. This makes it perfect with buttery cookie dough. Choose high-quality preserves with little added sugar for the best taste.
Proper Filling Methods
Here’s how to fill your jelly cookies like a pro:
- Use a small spoon or piping bag for precise filling
- Fill only to the cookie’s indentation edge
- Avoid overfilling to prevent spillage during baking
- Allow slight cooling before adding jam to prevent burning
Avoiding Common Filling Mistakes
Professional bakers know the secret to great jelly cookies. They choose the right preserves and use them carefully. Runny jams can leak, while thick ones are perfect. Always strain homemade jams for the best results.
Pro tip: Refrigerate your preserves for 15 minutes before filling to achieve optimal consistency for your raspberry jam cookies.
Baking Temperature and Timing Guide
Getting the perfect thumbprint cookies recipe needs careful attention to baking temperature and timing. The best temperature for baking these treats is usually 350°F. This ensures they have a golden-brown outside and a soft, tender inside.
It’s important to know how your oven works for consistent results. Ovens can vary in temperature, so using an oven thermometer helps you get it right.
- Baking time: 12-15 minutes
- Recommended temperature: 350°F
- Ideal cookie color: Light golden brown
Look out for these signs that your thumbprint cookies are done:
- Edges should be slightly firm
- Bottom of cookies should be light golden
- Jelly filling should be set but not bubbling
Pro tip for your thumbprint cookies recipe: Rotate the baking sheet halfway through cooking. This ensures even browning and makes your cookies delicious every time.
The secret to perfect thumbprint cookies is patience and precise temperature control.
If your cookies look pale, they might need a bit more time. If they’re browning too fast, try lowering the temperature by 25°F and bake a bit longer.
Storage and Freshness Tips
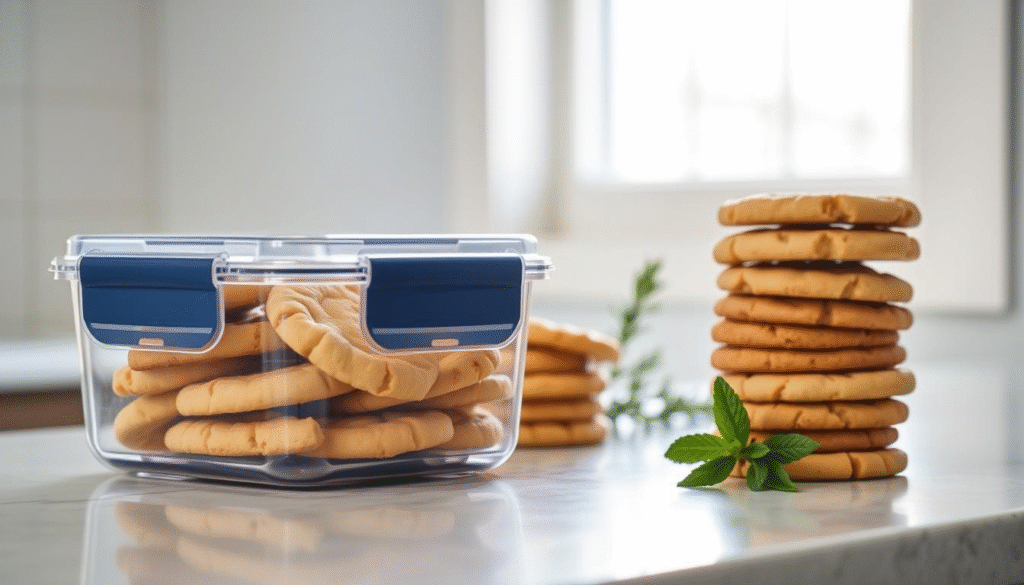
Keeping your homemade jelly cookies fresh is key. The right storage can keep them tasty and soft for up to a week. Start by letting them cool completely after baking.
Choose your storage method based on when you want to eat them. For short-term, room temperature storage is best. Here’s what to do:
- Use an airtight container with a tight-fitting lid
- Put parchment paper between the cookie layers to keep them from sticking together.
- Keep stored in a cool, dry area, away from direct sunlight.
- Keep cookies at room temperature for up to 5-7 days
For longer storage, refrigeration is a good choice. It’s great for cookies with fruit fillings. Wrap the container in plastic wrap to keep moisture out.
Freezing is the best way to store jelly cookies for a long time. Wrap each cookie in plastic wrap, then put them in a freezer-safe container. Frozen cookies stay good for up to 3 months. Thaw them at room temperature for the best taste.
Pro tip: Always let cookies reach room temperature before serving to restore their original texture and flavor.
Different jelly types affect how long cookies stay fresh. Cookies with high-sugar fruit preserves last longer. Choose your jelly carefully to keep your cookies fresh longer.
Decorating and Presentation Ideas
Turn your thumbprint cookies into stunning treats with creative decorating. These cookies are perfect for adding your personal touch. They will surely impress everyone.
Holiday Variations
Make your thumbprint cookies fit any season with fun decorations. Try these ideas:
- Christmas: Use red and green colored sugars or sprinkle crushed peppermint around the jelly center
- Halloween: Create orange and black themed cookies with matching jelly colors
- Valentine’s Day: Add heart-shaped sprinkles or use pink and red preserves
- Easter: Decorate with pastel-colored sugars and spring-themed sprinkles
Gift-Giving Suggestions
Thumbprint cookies are perfect for homemade gifts. Package them nicely to show off your baking talent:
- Use clear cellophane bags with festive ribbons
- Select decorative tins matching the holiday theme
- Create custom cookie assortments with multiple jelly flavors
- Include a handwritten recipe card for a personal touch
Your decorated thumbprint cookies will be a hit. They taste great and look like art, making any event special.
Common Mistakes to Avoid
Making the perfect thumbprint cookies needs careful attention. Even skilled bakers can make mistakes. Knowing these common errors helps you make delicious cookies every time.
When baking thumbprint cookies, several mistakes can ruin the result. By avoiding these, you can improve your baking and get tasty cookies.
- Overmixing the dough, which creates tough cookies
- Using cold ingredients that prevent proper texture
- Incorrect butter temperature
- Inconsistent cookie size
- Overfilling jelly centers
Temperature is key in making thumbprint cookies. Using room temperature butter makes the dough blend better. Cold butter can make the cookies dense and uneven.
| Mistake | Consequence | Solution |
| Overmixing | Tough, dense cookies | Mix until ingredients just combine |
| Incorrect Filling | Overflowing or dry centers | Use small spoon, fill 2/3 of indentation |
| Wrong Butter Temperature | Poor dough consistency | Use room temperature butter |
Getting good at making thumbprint cookies takes practice and patience. Focus on the right ingredient temperatures, mixing, and filling. This way, you’ll make perfect cookies every time.
Conclusion
Making delicious thumbprint cookies is an art that anyone can learn. This recipe shows that it’s easier than you think. The secret is knowing each step, from picking the right ingredients to baking perfectly.
Baking jelly cookies is more than just making a tasty treat. It’s about making memories in your kitchen. Every batch of thumbprint cookies is a chance to try new flavors and share love through baking. Your skills will impress everyone, making a classic recipe your own.
These jelly cookies are perfect for both new and experienced bakers. Begin with the basic recipe and customize it with your own touch. Baking is both a science and an art. With patience and practice, you’ll get better and more confident.
Enjoy baking these classic thumbprint cookies. Your kitchen will smell amazing, and your loved ones will love the treats you make. Happy baking!
FAQ
What are thumbprint cookies?
Thumbprint cookies are classic, buttery sugar cookies. They have a special indentation filled with jam or preserves. This indentation is made by using your thumb.
What type of jam works best for thumbprint cookies?
Raspberry jam is the top pick, but you can use other fruit preserves too. Try strawberry, apricot, or mixed berry jams for a change. Make sure the jam isn’t too runny to avoid spreading.
Can I make thumbprint cookies gluten-free?
Yes, you can use gluten-free flour blends instead of all-purpose flour. Look for blends that include xanthan gum to keep the cookie’s texture right.
How long do thumbprint cookies stay fresh?
These cookies stay fresh for 3-5 days in an airtight container at room temperature. If you refrigerate them, they can last up to a week. You can also freeze them for as long as 3 months.
Can I make the dough ahead of time?
Absolutely! You can make the dough and refrigerate it for up to 3 days before baking. Or, freeze it for up to 2 months. Just let it come to room temperature before baking.
How do I prevent my cookies from cracking?
To avoid cracking, make sure your dough is at the right temperature and not too dry. Work with chilled dough. When making the indentation, do it gently and slowly. If the dough is too crumbly, add a bit of milk or soften the butter a bit.
Are thumbprint cookies difficult to make?
Not at all! These cookies are easy to make, even for beginners. The steps are simple, and with a little practice, you’ll make perfect cookies in no time.
Can I use different fillings beside jam?
Yes, you can get creative! Try chocolate ganache, Nutella, caramel, or lemon curd. Just make sure the filling isn’t too liquid to prevent spreading.
What’s the best way to create the cookie indentation?
You can use your thumb, a small measuring spoon, or the end of a wooden spoon handle. The goal is to make a consistent, gentle indentation without breaking the dough.
What are some ways to make my thumbprint cookies appear more festive?
Roll the dough in colored sugar before baking, use different colored jams, or add festive sprinkles after filling. Dusting with powdered sugar can also give them an elegant look.